
 Hi Friends, I hope you are well.
From my experience as a domestic machine quilter, it is easier to tackle quilting motifs in small scale when quilting using a domestic sewing machine. The workable quilting area around the needle of the machine is generally no larger than 6″ or so – that’s why, I find quilting dense quilting much more manageable than trying to quilt “longarm style” on my domestic machine. But sometimes, certain quilts just require longarm style quilting with the quilting motifs being quilted in a much larger scale and further apart…

I thought I would share with you a few thoughts on how I did the embellished swirly vine “longarm style” on this quilt I recently completed…
#1. I made sure I mastered the basics first in small scale before moving up. The “basics” in this case is my swirly vine. I made sure I was able to quilt the motif well with all the curves being quilted without any jaggedness before moving up the scale. You can read more about the swirly vine in a Thread Talk post here, or you can see it done in my “Learn to Machine Quilt” online class here.
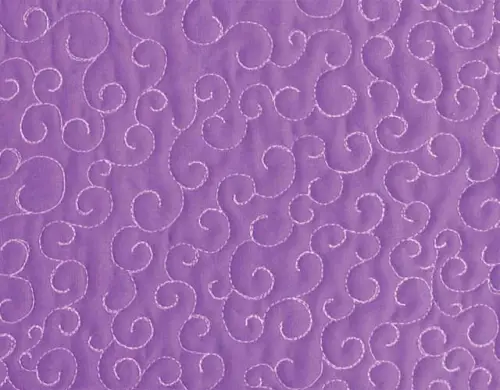
[image source: Swirly Vine from my Annie’s “Learn to Machine Quilt” class]
#2. I made sure I also mastered totally free-handing the motif and am able to quilt the motif comfortably all over the quilt before attempting to add any fancy strokes. If you aren’t comfortable in quilting free-hand, you might consider doodling on paper first. I place great value in doodling on paper in my “Learn to Machine Quilt” online class.

Now, if you are past #1 and #2, and are ready to dress up the swirly vine motif and make a totally quilting motif out of it, here are the schematics.
These are the swirly vines drawn in a much larger scale. The starting swirl at the top right corner is about 2 1/2″ in length just so you get an idea about the scaling.

2. If you are comfortable quilting these swirls with no major hiccups, you can add some petal lobes at the base of the swirl before you head off again to start another swirl. See if the following schematic makes sense to you.

3. You only have to echo around the lobes to get out to start another swirl. See what I mean?

4. Repeat until the quilting area is quilted.

5. Here, you see the quilted reality.


I hope this gives you an idea on dressing up the basic quilting motifs you have been using.Thanks for stopping by. Hugs to you all!

Love this, I am waiting for my slider to arrive, ordered it on eBay. Could not find one here near me or in Canada on line… Cheapest was eBay? It is on its way. Looking forward to your class on line.
Bunny
Thank you for all the enlightening photos and comments. You area great help and inspiration to me. Thanks again for sharing.
Hi Wendy Just want to thank you for the lesson. You posted it at just the right time. I am about to start quilting a little charity quilt . Now I know what I am going to try quilting on it. I love the way you use the colored pencils it makes it so much easier to follow. Thanks for all the ideas you give us. I do appreciate it. Also love your Annie’s class it is so nice to actually watch you quilt and have you talk to us.
Just beautiful. What a lovely filler motif, and so kind of you to share. I really do enjoy your blog so much. You are so generous with your talent, and your photos are so clear, and of course your quilts are terrific. Thanks for sharing!
Thank you!!! This is fantastic, and I have just the quilt in mind… a baby girl quilt under construction.
Love the swirls with the petals added. Thanks for your precise instructions. The creative juices are flowing on how to embellish other simple motifs. I always enjoy seeing what you are accomplishing. Thanks for sharing.
Thanks for this! I needed a new quilting motif, so this was timely, as you always manage! You are such an inspiration, and I hope that you know how much I thank you for that. I don’t often jot a note, but I’m in the background silently amazed at your work and your willingness to share ideas.
THANK YOU THANK YOU THANK YOU!
I love what you’ve done, and, NO!, I’m not even close to having it mastered. You, on the other hand, NAILED IT! Beautiful,
Thank you so very much. I am just starting to do fmq. I do not have a long arm. But I am planning on practicing some of your beautiful motifs. Hugs
Thank you, Wendy, you are a gem!
I have been practicing drawing swirls and getting stuck on the smooth travelling, so this has come at the right time. Yes, I did save your previous post but our computer crashed and they reinstalled Windows so I lost all my favourites. Also, didn’t have the time to start searching your posts.
Hope to take your class soon when things quieten down here.
Once again a wonderful tutorial for those wishing to learn. I have passed the link to your blog to a few ladies who are learning.
Perfectly wonderful details on this, Wendy. Thanks so much for taking the time to really expain how you create this motif. I love it.
Wonderful! Thank you so much for sharing. I’m going to try it. :-)
Wendy, when I see your beautiful results it makes me want to keep on trying. And, yes, you are right……..doodling on paper is where it all starts!
This “Long Arm Quilting” looks very nice! I get how you add on to what you have already taught us in your class. Thank you for showing us and giving us the “Power” to doodle to come up with new and fun motifs!
Hugs back to you :-)
Thank you so much for this post, Wendy. When I questioned you last week about a “long-arm style” video I had no idea you could explain this so completely and clearly without one. I signed up and have “taken” your Annie’s quilting class and thoroughly enjoyed it. I think it will help me jump right in the fmq water instead of just dipping my toes. I’m thinking it boils down to practice, practice, practice and there are NO short-cuts. You really are an inspiration, though. There was a time when I totally hated machine-quilting & was a hand-quilting snob. No more—-your quilts are works of art and the beauty of your machine quilting is awesome! Thanks again from the bottom of my heart!
It’s wonderful to see how you break down a quilting design. You’ve made it easy to understand, and easy to expand upon, with practice of course! I love the rounded flow of this design. It’s gorgeous!
Wendy, I love your quilting and your tips you so willingly share. I have been wondering how you manage to stay focused on quilting a busy top without losing track of where you are stitching. I find it hard to “see” where I am at, even with my overhead light out and just the longarm light on. Any suggestions? thanks so much! Paula “Sew Silly” Coleman, Topeka, KS
Hi Paula,
My sewing machine has a pretty bright light for me to see. I keep track of my quilting by keeping track of where my needle goes. With the bright light on my sewing machine, I generally don’t have a problem. But sometimes, I do have to get the quilt out of the sewing area, and spread it out on the floor to see what areas I have covered. It is not a problem per se, just a fact of life when one quilts with a domestic machine.
Hope that helps?
WS
You have impeccable timing. :) This would fit the bill perfectly for my next FMQ quilt – and I was stumped. I think I shall try this!
This is phenomenal! I know I use this word so much, but phenomenal describes you and your quilting so very much — and hugs to you!
I have a lot to do on my initial class, but I am going to take off time from my grandchildren’s quilts to work on my machine quilting class by Wendy Sheppard starting in about the middle of February.
It looks so beautiful and easy on here, but mine looks nothing like this. think it will be back to the practicing board
Beautiful quilting! I quilt on a domestic machine to and find myself doing the smaller designs because it is easier for me to do.
Hey, Wendy!! Such a helpful, clear explanation (evidenced by the above comments). This design so helps “break through” that barrier between the smaller DSM quilting designs and the more open “long-arm” style. I think I may use this one on the top I just pulled from my stash (done several years ago using only stash fabrics—yay!). Its delicate pastels just beg for a flowery/viney motif. Thanks so much! Will be the project on the machine this weekend!! Blessings and hugs to all your way……D
Thanks for there great post on quilting. Pat
This was a timely post as I just learned from the quilt I am working on that on a DSM you do have to seriously consider the scale of the motifs you stitch. Even when it seems doable while doodling, stitching with the resistance imposed by fabric and batting might another story. Which was also a lesson learned about the value of doing test blocks (aways from now on!).
Wendy thank you so much for another tip…
You make it look so easy!!! I really want to practice this – it looks fun!
Thank you so much for the details. I’m going to practice this. I love the swirly vine and use it a lot but have never added petals. What a great idea. Thanks again.
I am going to try this one on my longarm! A very nice, interesting design.
Thank you for the tutorial on how to attack this kind of design. I’m going to have to spend some time with paper and pencil, doing the basic swirl and then adding the embellishments.
I tip my hat to you yet again for sharing another wonderful quilting motif! You inspire us all with your quilting skills – Thanks again!
So hey – I just used this for the first time on a small quilt. It’s nice! Very forgiving. :D http://whatahootquilts.blogspot.com/2013/02/finish-friday-wheelchair-quilt-3.html
Pingback: Pattern Play in QUILT (June/July 2013) | Ivory Spring
Your such a clever lady. I love getting your blog emails they really inspire me to try something new. Thanks so much.
Pam from Nova Scotia
Pingback: COVER QUILT ALERT! Scrappy Jewels in FONS & PORTER’S EASY QUILTS (Winter 2013) | Ivory Spring
Pingback: 2015 Free-Motion Quilting Challenge – December Challenge with Wendy Sheppard and Grand Prize Info | QuiltShopGal
Pingback: Free motion quilting challenge – December | Slaney HandCraft
I just found your site and I am so happy with the instructions you provided above that I am going to follow you so I can learn more from someone who obviously knows how to machine quilt but also how to teach it! Thank you!
Just today I was thinking about selling my longarm because I am never satisfied with my work. You give me hope with your wonderful instructions and very graphic details for the designs. Thanks so much for your blog. I am in Quilting Heaven and have more hope that I can learn to quilt better now that I have found your blog. Thanks so much!!!!
Pingback: How Are You Going to Paisley Quilt It? – Home Sewn By Us